Create Account Group
To create an Account Group:
1. From within the Control Center window select the Tools menu and then select the menu item Once in the Options window select the "Data" tab and press the button "Account Groups"
2. Select an account that you wish to add to your Account group from the "Available accounts" list
3. Press the "left arrow" button to move this account to the "Assigned accounts" list
4. Give the Account Group a name
5. Press the "Save" button
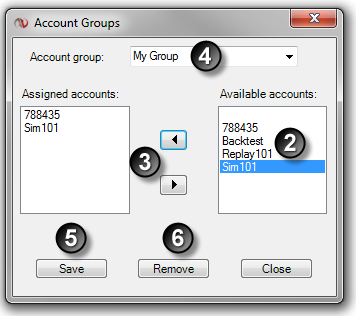
The "My Group" (in image above) account will now be available in all account selection lists in all order entry interfaces.
Remove Account Group
To remove an Account Group:
1. Select an Account Group in the Account group selection list (icon #4 in the image above)
2. Press the "Remove" button (icon #6 in the image above)
|


