|
NinjaScript > Educational Resources > Tutorials > Indicators > Intermediate - Your own SMA > Set Up |

  
|
|
NinjaScript > Educational Resources > Tutorials > Indicators > Intermediate - Your own SMA > Set Up |
|
|
The first step in creating a custom indicator is to use the custom indicator wizard. The wizard will generate the required NinjaScript code that will serve as the foundation for your custom indicator.
1. Within the NinjaTrader Control Center window select the Tools-->New NinjaScript-->Indicator... menu 2. Press the "Next >" button
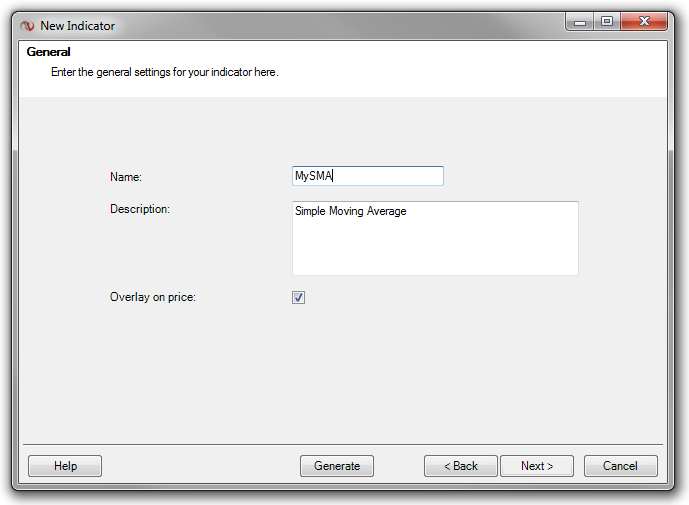
Defining Indicator Properties and Name
3. Enter the information as shown above 4. We have checked the option "Overlay on price" which means that this will be a price overlay indicator (will plot on top of the price data instead of in its own indicator panel) 5. Press the "Next >" button
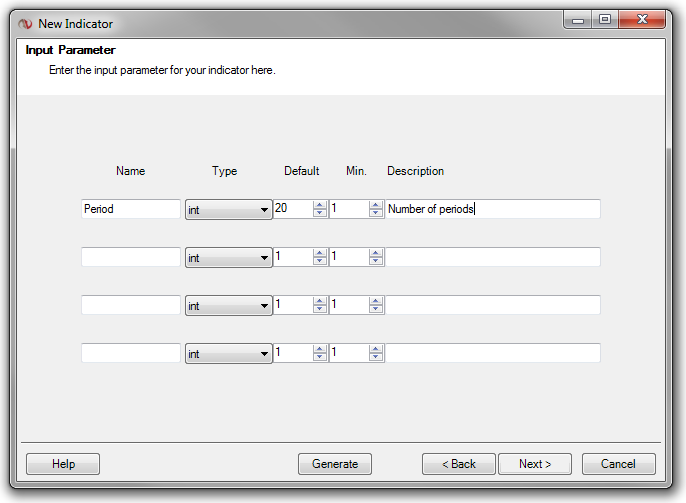
Defining Input Parameters Below you will define your indicator's input parameters. These are any parameters that can be changed by the user and used in the calculation of the indicators value(s). If your indicator does not require any parameters leave the "Name" fields blank.
6. Enter the information as shown above
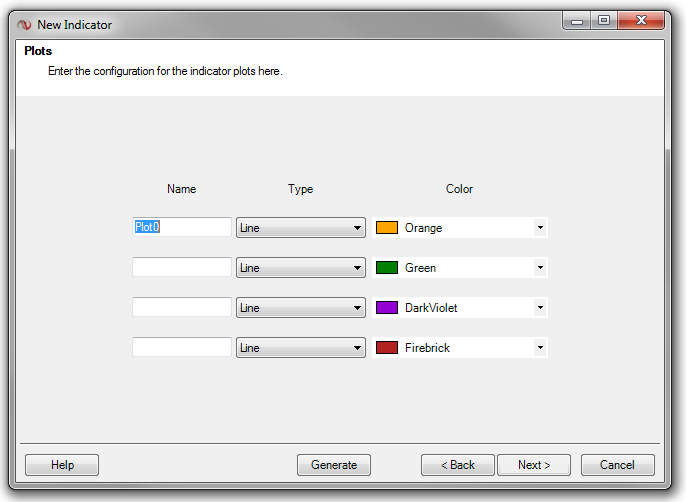
Defining Plots Below you will define how your indicator is plotted on a chart.
8. Enter the information as shown above. 9. Press the "Next >" button
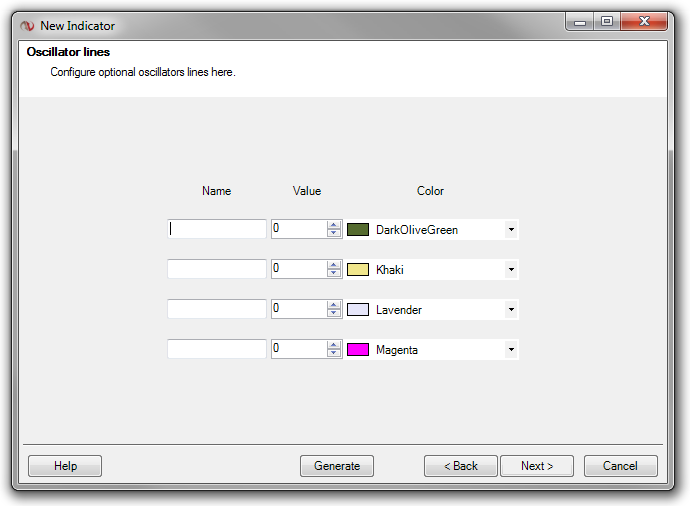
Defining Oscillator Lines Below you will define any required oscillator lines. This would be the "Zero" line in the CCI indicator for example. If your indicator does not require any oscillator lines leave the "Name" fields blank.
10. Enter the information as shown above (make sure the "Name" fields are blank since we do not need an oscillator line for a simple moving average indicator) 11. Press the "Next >" button 12. We are now finished entering in our indicator set up information. Press "Finish" button.
* At any time, you can press the "Generate" button in the wizard if you do not need to go through each of the wizard steps.
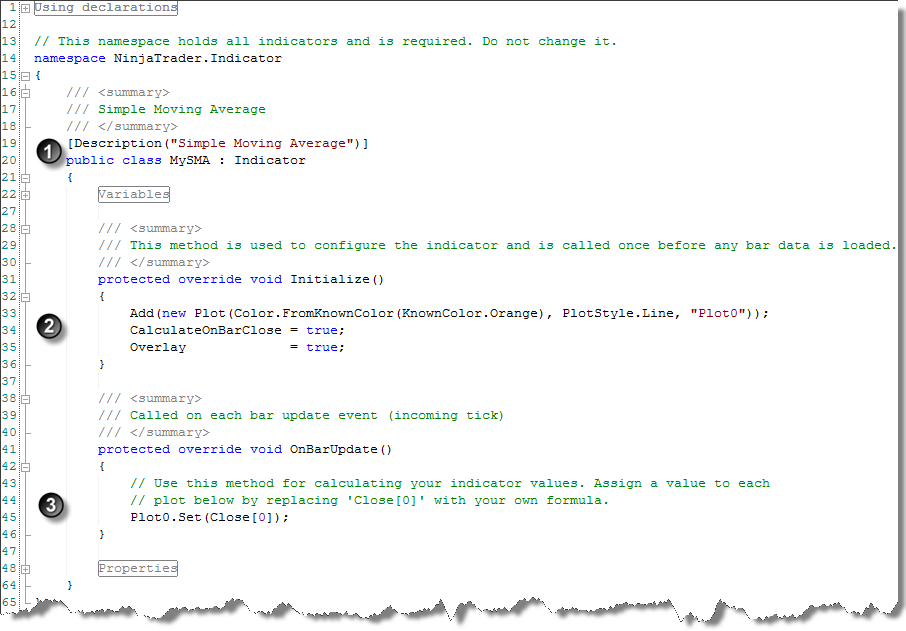
You will now see the NinjaScript Editor preloaded with NinjaScript code generated by the wizard. It should look something like the image below.
Your primary area of concern will be sections "2" and "3".
1. This section provides the indicator with the chart display name and description used in the Indicator Dialog window. 2. The Initialize() section is processed only once when the indicator is initially loaded (added to a chart for example) and can be used to set up any indicator configuration requirements. You can see that this wizard generated code that added the plot color and style and set the "Overlay" property which we configured in the wizard in step 4 above. The default value of the "Period" parameter is set in the "Variables" region of the code above Initialize(). 3. This is the section that is called on each bar update (incoming tick) and is where you will enter your indicator logic |